Emake Galaxy 1 Resin 3D Printer Review - Big Prints, Great Features, Value Price

Hi, I'm Matt, and today I'm excited to review the emake Galaxy 1 resin 3D printer. This machine boasts a large build volume, a heated chamber, an automatic resin pump, and more! Let's dive in.
Key Features
- Spacious Build Volume (200mm x 400mm x 400mm): This generous build area allows you to print large, intricate models in a single piece, minimizing the need for assembly. It's perfect for creating props, figurines, functional prototypes, and more.
- Heated Chamber: Precise temperature control ensures optimal resin viscosity and curing. This is especially beneficial for engineering-grade or temperature-sensitive resins, guaranteeing consistent print quality even in colder environments.
- Automatic Resin Pump: This convenient feature eliminates the need to manually refill the vat. It maintains a consistent resin level, preventing print failures due to insufficient material and saving you time.
- Activated Carbon Filter + Ventilation Ports: The filter effectively minimizes resin fumes, creating a safer and more pleasant working environment. Additionally, the dedicated ventilation ports allow for connection to external exhaust systems for even greater air quality control.
- User-Friendly Interface: The intuitive touchscreen simplifies navigation and print management. Clearly organized menus and responsive controls make the printer accessible to users of all skill levels.
Additional Considerations
If relevant to the printer, you might also highlight:
- Resolution: Detail capabilities (XY resolution and minimum layer height).
- Print speed: How quickly the printer can complete a job.
- Connectivity: USB, Wi-Fi, Ethernet options.
- Software Compatibility: Supported slicing software.
Unboxing and Setup
- Unboxing: The emake Galaxy 1 arrives securely packaged with all components carefully protected. You'll find:
- The printer itself
- Build platform
- Resin vat
- Power supply
- Toolkit (Allen wrenches, etc.)
- Clear, illustrated instruction manual
- Manufacturer Pre-Assembly: Some steps may be pre-completed, especially on early production models. This streamlines the setup process even further.
- Setup Process:
- Carefully remove components from packaging.
- Install the build platform and resin vat.
- Level the build platform (the printer may have automatic or assisted leveling features).
- Connect the power supply and any desired connectivity (USB, Wi-Fi).
- Follow the instruction manual for initial calibration and test prints.
Tips:
- Workspace: Set up in a well-ventilated area with a flat, stable surface.
- Gloves and Safety: Wear nitrile gloves when handling resin and uncured prints.
- First-time Users: If you're new to resin printing, online tutorials and the printer's manual will be invaluable resources.
The emic Galaxy 1 aims to provide a user-friendly setup experience. Even those new to resin printing should find the process approachable with clear instructions.
Test Prints and Results
- Test Print Selection:
- Choose test prints designed to expose common printing issues (overhangs, fine details, bridging, dimensional accuracy).
- Popular sources include calibration models on Thingiverse or dedicated test print suites.
- Slicing Software Settings:
- Layer Height: Start with a standard 0.05mm layer height for detailed prints. Experiment with smaller layer heights for even finer details or larger layers for faster print times.
- Exposure Time: Refer to your resin's recommended exposure times as a starting point. You may need to run exposure calibration tests to fine-tune this setting.
- Support Structures: Utilize your slicing software's support generation tools, adjusting density and contact points as needed for optimal print success.
- Results Analysis:
- Dimensional Accuracy: Measure critical dimensions of your test prints using calipers and compare against the digital model. Identify any necessary printer calibration adjustments.
- Surface Finish: Examine for smoothness, visible layer lines, "ringing" artifacts, or any signs of under/over-exposure. Adjust settings accordingly.
- Structural Integrity: Test the strength of overhangs, thin walls, and delicate features. Adjust support structures or exposure times if needed.
Advanced Tips:
- Resin Tuning: Experimenting with different resins of varying viscosities and properties can further optimize print quality.
- Temperature Control: If your printer doesn't have a heated chamber, monitor ambient temperature and adjust resin properties or exposure times if necessary.
- Post-processing: Learn proper washing and curing techniques to maximize print quality and durability.
Specific settings will vary depending on your printer, resin choice, and the desired print characteristics.
Pros
- Large Print Capacity: The emic Galaxy 1's build volume caters to ambitious projects. Print cosplay props, scale models, or even multiple smaller components in a single batch, saving time and potential assembly hassles.
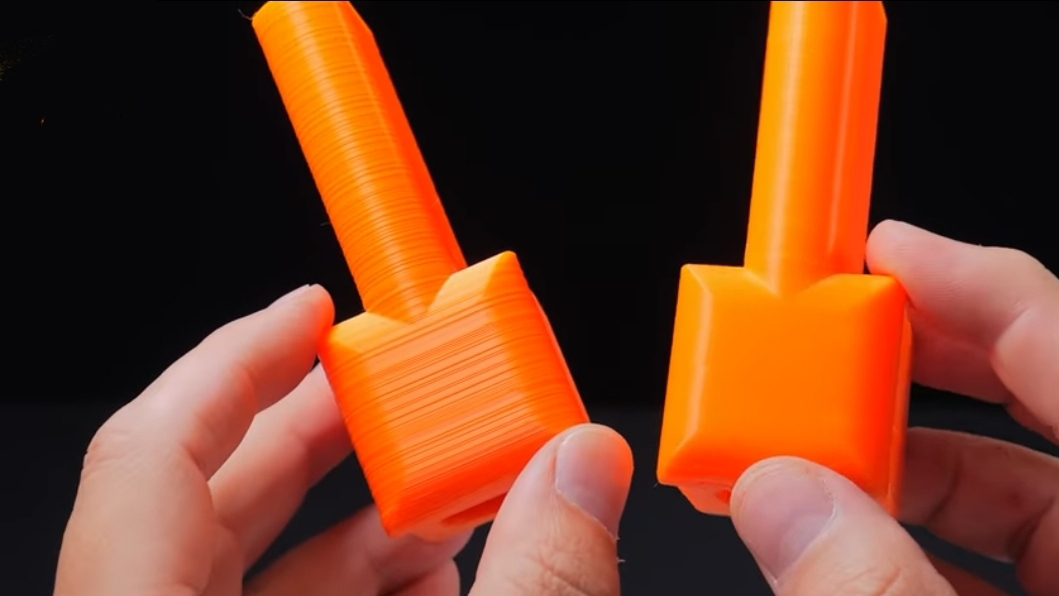
- Excellent Print Quality: From what we've seen in the test print, this printer delivers high levels of detail and surface smoothness. This translates to visually appealing models and functional parts with minimal post-processing.
- Heated Chamber + Resin Versatility: Maintain consistent print quality regardless of room temperature. Use a wider range of resins, including those with specific temperature requirements, for greater project flexibility.
- Automated Features = Time Savings: The automatic resin pump eliminates the need for manual refills, minimizing print interruptions and keeping your workflow smooth.
- Competitive Price Point: Consider the Galaxy 1's combination of build volume, features, and print quality in relation to its price. It seems to offer excellent value compared to similar sized resin printers on the market.
Additional Notes:
- Depending on the printer, you might also emphasize:
- Build quality: Robust construction and reliable components for longevity.
- Community support: Active user forums or helpful manufacturer resources.
- Software ecosystem: Ease of use and features of any included or compatible slicing software.
Cons
- Occasional Support Issues: As with most resin printing, complex models may require careful support structure design to avoid failures. This skill is gained through practice and understanding your printer's capabilities.
- Resin Handling: Resin 3D printing requires adherence to safety measures. Always wear gloves and work in a well-ventilated space. Resin can also be messy, so prepare your workspace accordingly.
- Learning Curve: While the emic Galaxy 1 aims for accessibility, resin printing has a steeper learning curve than filament-based (FDM) 3D printing. Be prepared to invest time in understanding slicing settings, supports, and post-processing.
- Cost of Materials: Resin is generally more expensive than FDM filaments. Budget for resin costs, cleaning supplies (isopropyl alcohol), and replacement consumables like FEP film for the resin vat.
- Potential Long-Term Maintenance: As with any complex machine, there may be moving parts or components that require occasional maintenance for optimal printer performance over extended periods.
Some of these "cons" are inherent to resin 3D printing technology rather than specifically the emic Galaxy 1. It's helpful to frame them for potential buyers, especially those new to resin printing.
The emic Galaxy 1 is a fantastic option for those needing large-format resin 3D printing capabilities. It delivers impressive results, user-friendly features, and excellent value. If you're in the market for a big resin printer, this one's a serious contender.


Comments
Post a Comment